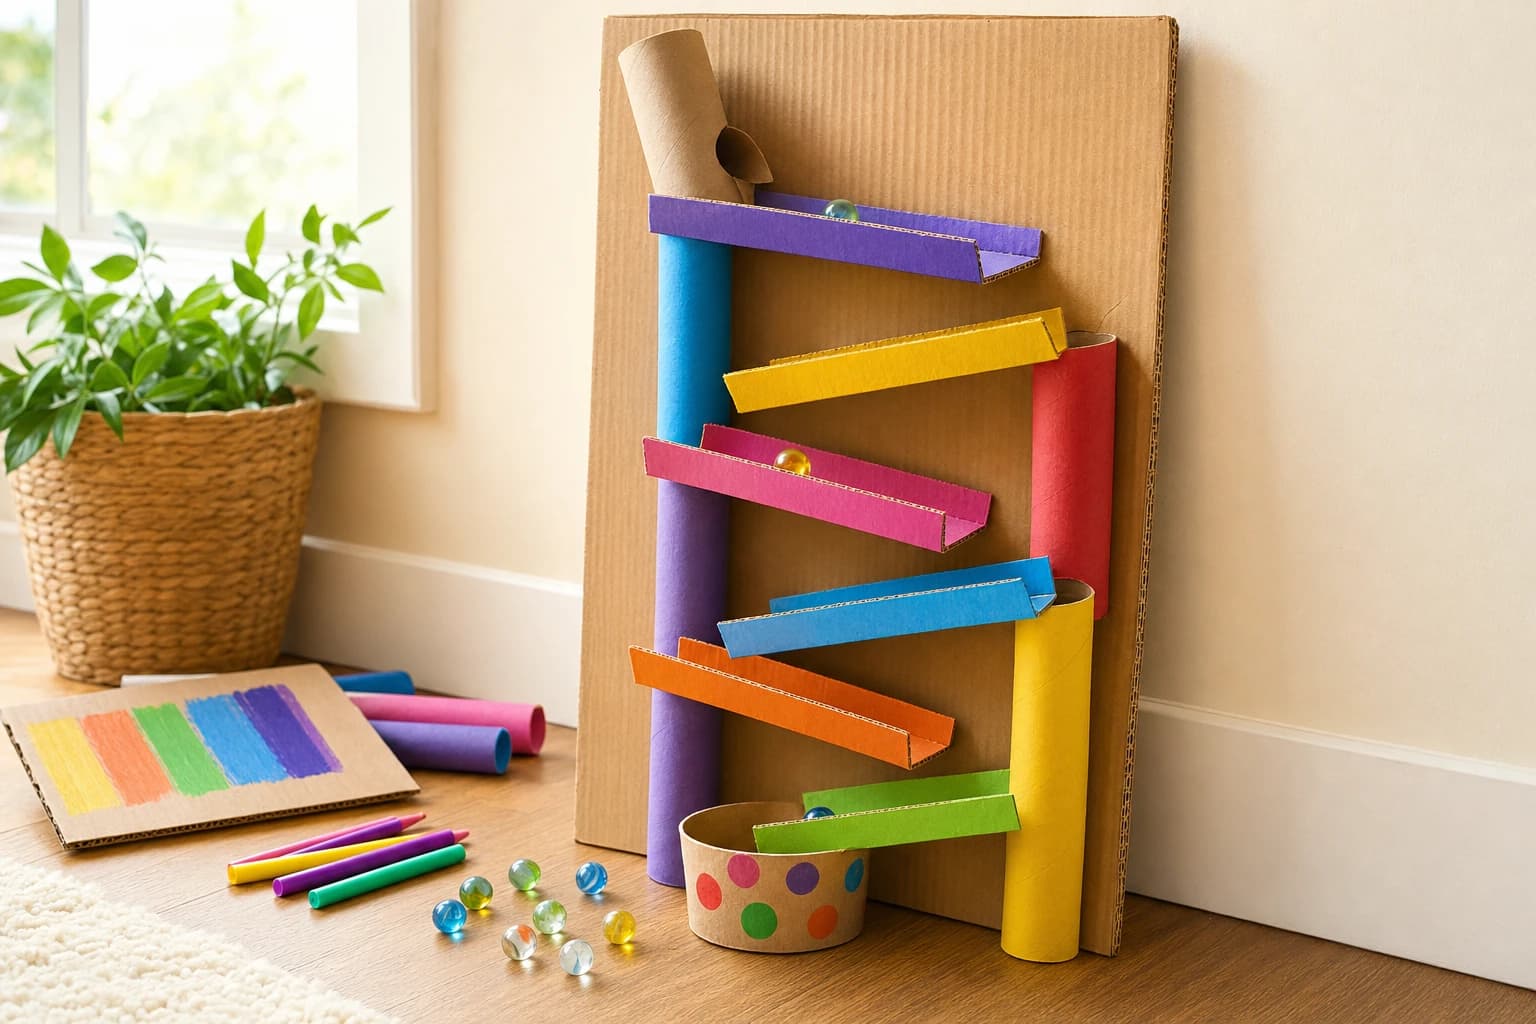
A DIY cardboard marble run indoor game is part craft project, part STEM activity, and part family challenge. It works well on a rainy afternoon because it uses common household materials: cardboard, tubes, tape, and a marble or safe rolling substitute.
This guide shows you how to build a sturdy wall-style marble run, adjust the difficulty, fix common problems like stuck marbles, and turn the finished track into timed games, teamwork challenges, and classroom-friendly activities. It also includes safer alternatives for younger children who are not ready to play with marbles.
Quick Overview: Time, Difficulty, and Best Ages
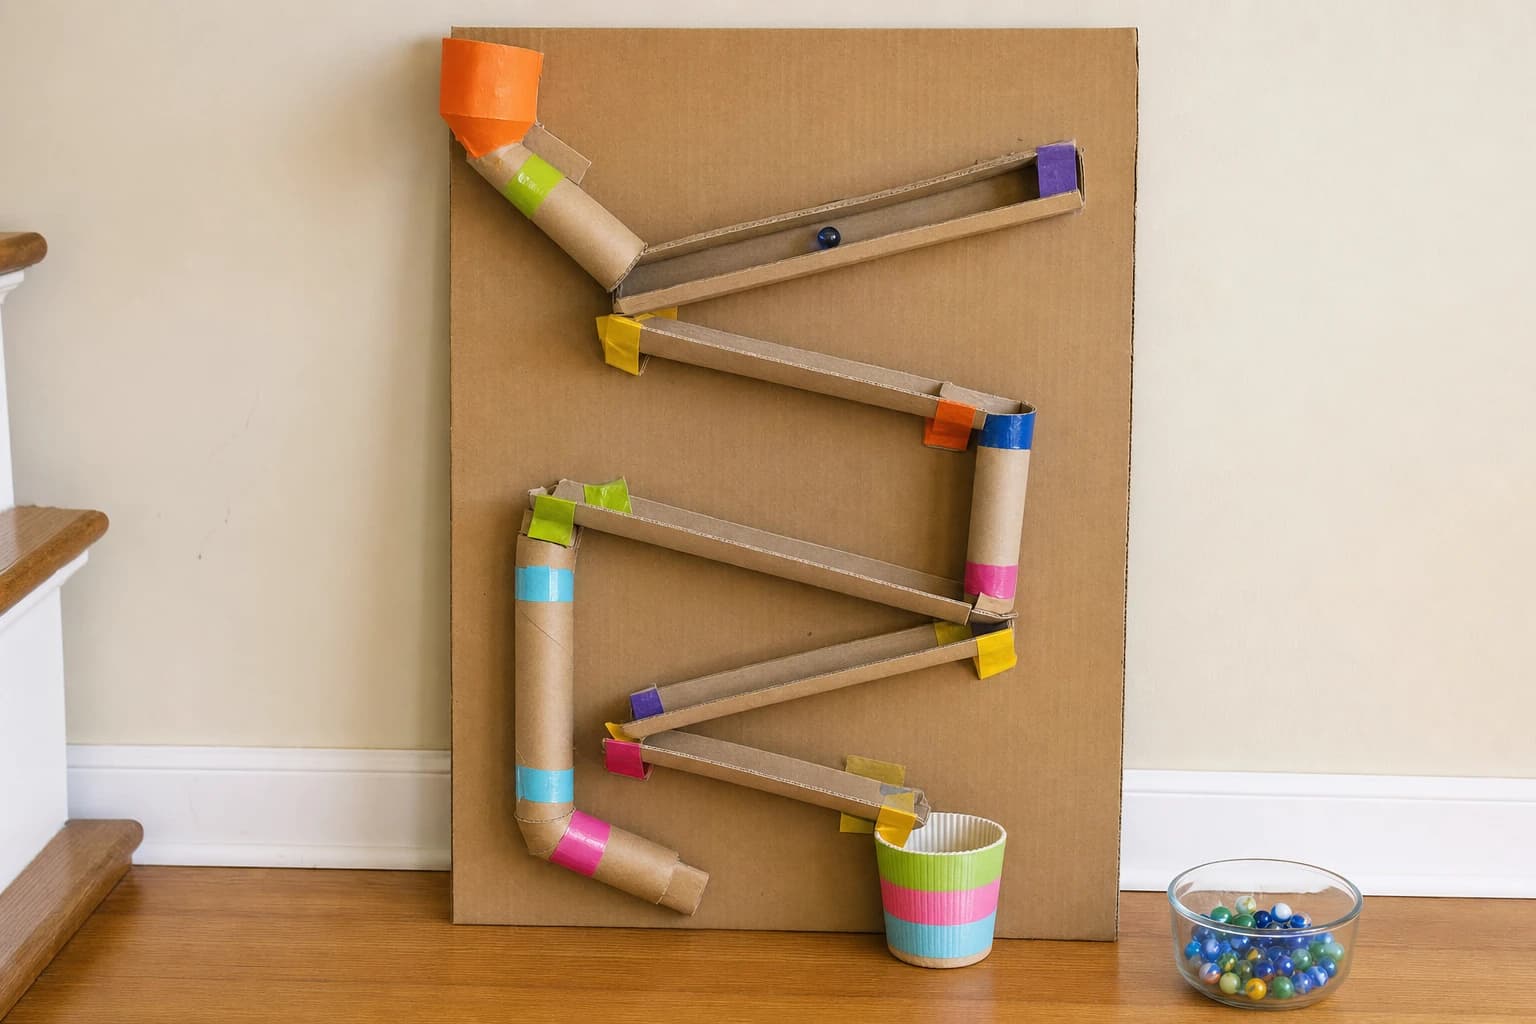
This project is flexible. A basic version can be built in about 30 to 45 minutes, while a more detailed track with gates, tunnels, and scoring zones can take 60 to 90 minutes. The best build style for most homes is a large flat cardboard base propped against a wall or chair. It is easier to tape, easier to repair, and less likely to fall over than a tall tower.
Children can help with planning, decorating, taping, and testing. Adults or older teens should handle any cutting with a craft knife. For younger children, skip the marble and use a pom-pom, crumpled paper ball, large wooden bead, or ping-pong ball, depending on the size of your track.
Safety Note Before You Start
Marbles are small parts and can be a choking hazard for young children. The U.S. Consumer Product Safety Commission explains that small parts are a serious concern for children under 3 years old. You can read its guidance here: CPSC small parts guidance.
Use close supervision, keep marbles away from babies and toddlers, and choose larger rolling objects if there is any chance a child may put pieces in their mouth. Also, keep scissors, skewers, and craft knives in adult hands unless the child is old enough and already knows safe tool use.
Materials for a DIY Cardboard Marble Run Indoor Game
You do not need a special kit. The most useful materials are lightweight cardboard pieces that can be cut and bent into ramps. Corrugated cardboard works best for the base because it stays stiff. Cereal boxes and snack boxes are useful for curved ramps, funnels, and gates.
- Large cardboard base: one piece about 18 x 24 inches or larger, such as a flattened shipping box
- Cardboard strips: 8 to 12 strips, each about 1.5 to 2 inches wide and 6 to 12 inches long
- Cardboard tubes: 2 to 4 toilet paper tubes or 1 to 2 paper towel tubes
- Tape: masking tape or painter's tape for easy adjustments; packing tape for stronger final joints
- Scissors: for thin cardboard and paper tubes
- Craft knife and cutting mat: optional, adult use only, helpful for thick cardboard
- Ruler: useful for making even ramps and side rails
- Marker: for drawing the path before taping
- Catch cup or small box: one at the bottom to collect the marble
- Rolling object: one marble, pom-pom, paper ball, ping-pong ball, or large bead
- Optional decorations: stickers, crayons, colored tape, scrap paper, or washi tape
If you are setting this up for a group, prepare extra ramp strips before children begin. A good group kit is one base board, 12 ramp strips, 3 tubes, 1 catch cup, and a roll of masking tape for every two to three children.
How to Make a Cardboard Marble Run Step by Step
The key is to build, test, adjust, and test again. A marble run rarely works perfectly on the first try, which is part of the learning. Children can see how slope, speed, friction, and alignment change the result.
1. Choose the base and set the angle
Use a large, flat cardboard panel as the backing board. Prop it against a wall, sofa, heavy chair, or stack of books. A gentle angle is usually better than a very steep angle. If the board is nearly vertical, the marble may fly off the ramps. If it is too flat, the marble may stop halfway down.
As a starting point, lean the board so the top is about 8 to 12 inches away from the wall when the bottom touches the floor. This is not a strict rule, but it gives enough slope for most marbles without making the track too fast.
2. Draw the route lightly in marker
Before taping anything, draw a loose zigzag path from the top left or top right down to the catch cup. Leave room between ramps so the marble has space to drop from one level to the next. A good first design has 5 to 7 ramps, not 15. Too many pieces make the first build frustrating.
Mark the start with a circle and the finish with a box. If multiple children are helping, ask them to predict where the marble will speed up, slow down, or fall off. This turns the craft into an indoor STEM game for kids instead of just a decoration project.
3. Fold side rails on each ramp
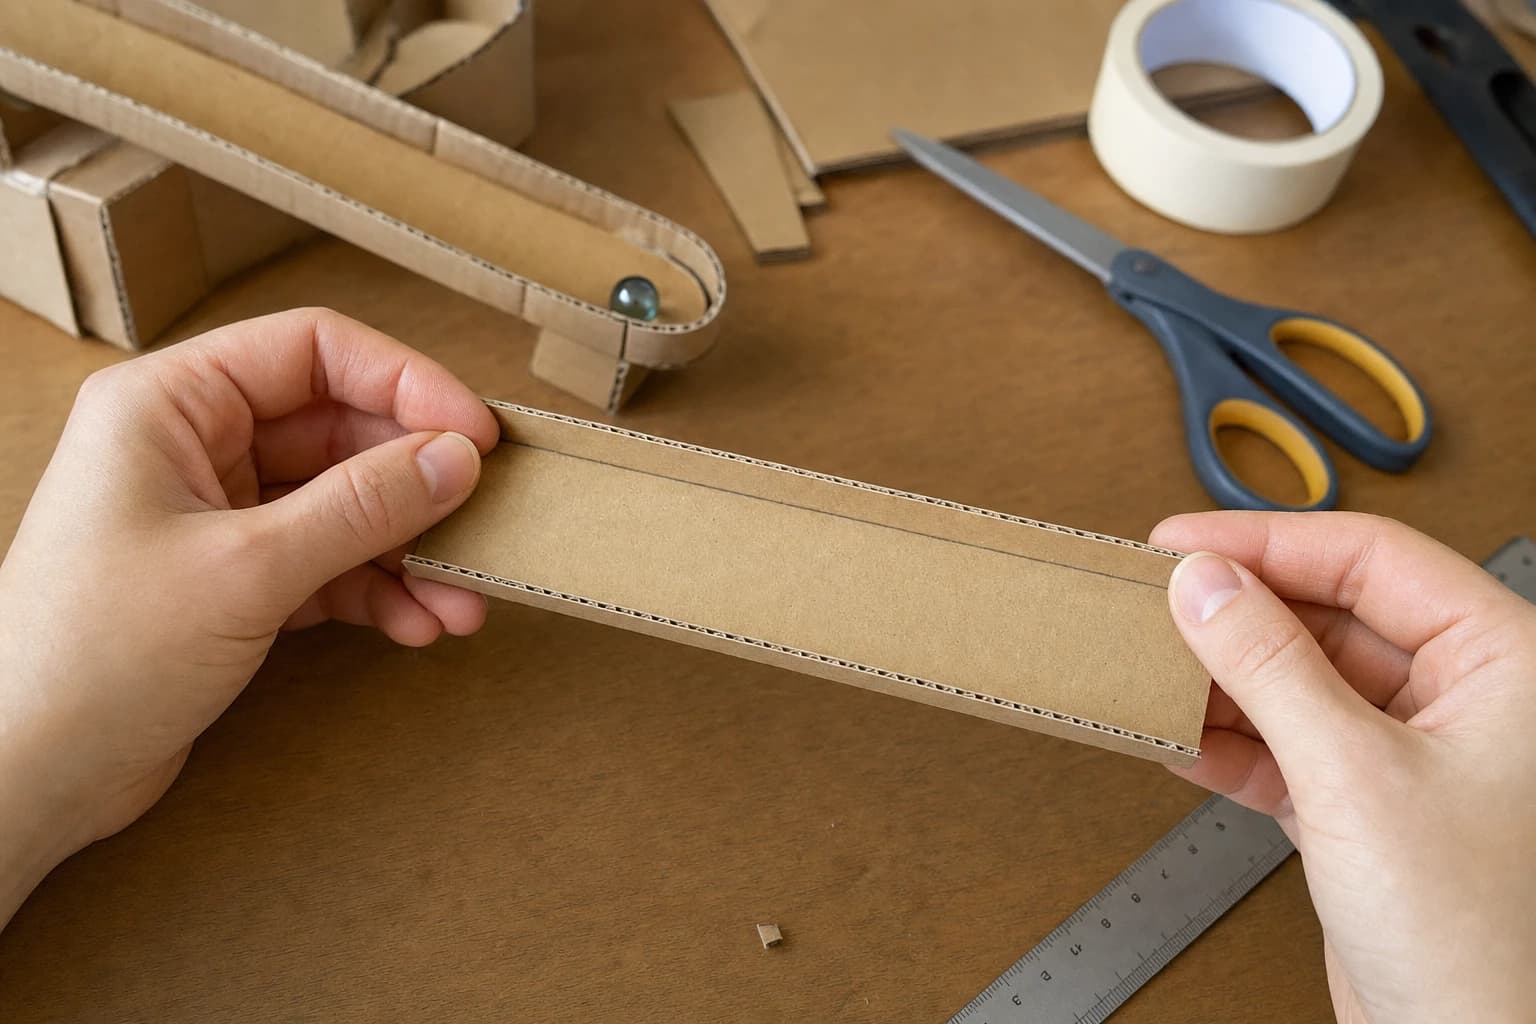
Cut a cardboard strip about 2 inches wide. Fold up a narrow edge on both long sides, about 0.25 to 0.5 inch each. These small walls help keep the marble from rolling off the sides. If your cardboard is too stiff to fold neatly, tape thin strips along both edges instead.
For pom-poms or paper balls, wider ramps work better. Use strips about 3 inches wide because soft rolling objects do not travel as predictably as marbles.
4. Tape the first ramp and test immediately
Tape one ramp near the top of the board. Do not build the whole track before testing. Place the marble at the start and watch where it leaves the first ramp. Then place the second ramp exactly where the marble naturally lands.
Use small tape loops or short strips of masking tape at first. Temporary tape makes it easier to move pieces. Once the track works, reinforce the joints with longer strips of tape.
5. Add ramps one at a time
Keep adding ramps down the board. Each ramp should overlap the marble's landing zone by at least 1 inch. If the gap is too wide, the marble may bounce out. If the ramp points upward even slightly, the marble may stop.
Try alternating ramp directions: left to right, then right to left. This creates a zigzag path that fits on a smaller board and gives children more chances to make design decisions.
6. Add tubes, tunnels, or a funnel
Cut a paper towel tube lengthwise to make an open half-pipe ramp, or leave a toilet paper tube whole to make a tunnel. Whole tubes are fun, but they hide the marble, so use them in short sections. If a marble gets stuck inside a long tube, children cannot easily see why.
To make a simple funnel, cut a wide curved piece from a cereal box and tape it into a shallow cone or bowl shape. Place it before a drop so the marble circles briefly before leaving through a lower opening.
7. Build a finish area
Tape a small cup, yogurt container, paper bowl, or cardboard box at the bottom. This is more than a cleanup feature. It gives the game a clear goal. For scoring games, draw three finish zones: center cup for 3 points, side cup for 2 points, and floor landing zone for 1 point.
8. Run three full tests before decorating
A track that works once may not work every time. Run at least three test marbles from the exact same start point. If the marble finishes all three times, the structure is ready for decoration and game rules. If it fails, adjust the slope, landing gaps, or side rails before adding stickers or heavy decorations.
Helpful Build Measurements
Exact measurements are not required, but the table below gives a practical starting point. Use it when children are frustrated or when a classroom group needs clearer limits.
| Part | Suggested size | Why it helps |
|---|---|---|
| Base board | At least 18 x 24 inches | Leaves enough room for a 5-ramp beginner track |
| Ramp width for marbles | 1.5 to 2 inches | Wide enough for control without using too much cardboard |
| Ramp width for pom-poms | 3 inches | Soft objects need a wider path and more guidance |
| Side rail height | 0.25 to 0.5 inch | Helps prevent the marble from jumping the edge |
| Gap between ramps | 0 to 2 inches | Short gaps are easier; longer drops increase difficulty |
| First track length | 5 to 7 ramps | Long enough to be fun but short enough to debug |
Turn the Craft Into a Playable Indoor Game
Once the marble run works, give it rules. Game structure keeps children engaged longer and encourages them to revise the design instead of abandoning it after one successful run.
Beginner level: Three-in-a-row finish
The goal is to make the marble land in the finish cup three times in a row. Players may adjust only one piece after each failed attempt. This keeps the game focused and prevents the whole track from being rebuilt after every problem.
Intermediate level: Timed marble run
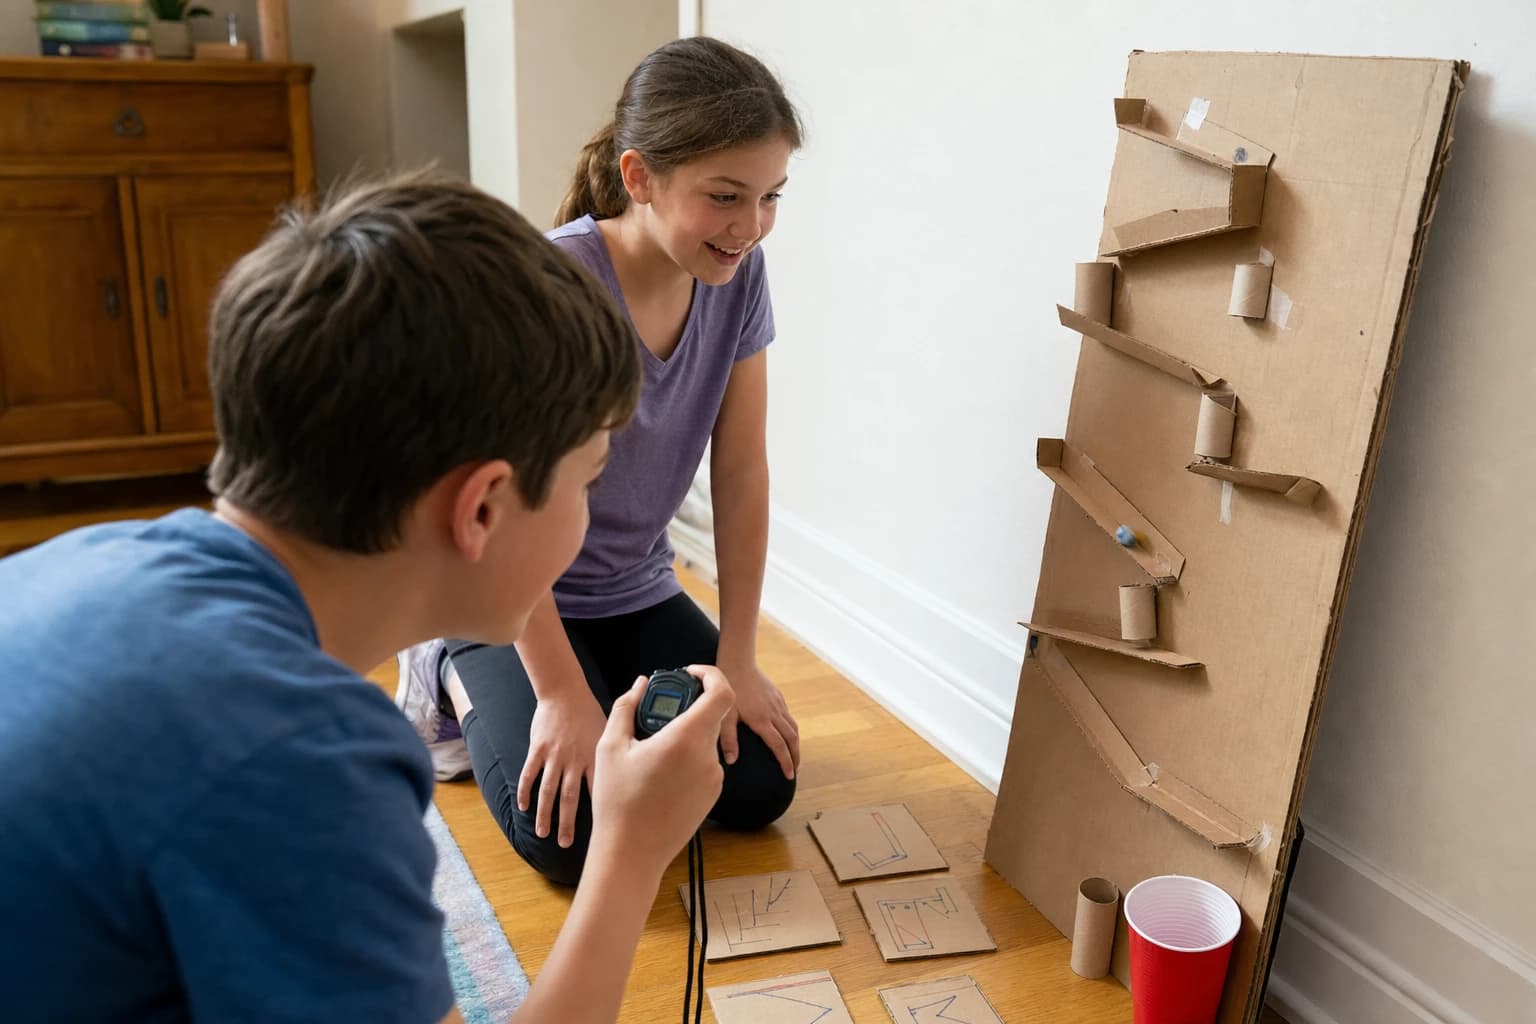
Use a phone timer or stopwatch. One person releases the marble while another times from release to landing. The challenge is to finish between two target times, such as 4 and 6 seconds. If the marble is too fast, players add a flatter ramp, a curve, or a tunnel. If it is too slow, they increase the board angle or remove rough tape from the path.
Advanced level: DIY marble run challenge cards
Write challenges on small slips of paper and draw one before each round. Try these:
- Use exactly 6 ramps and 1 tube.
- Make the marble change direction at least 4 times.
- Add one jump, but the marble must still finish safely.
- Build a track where the marble takes at least 5 seconds to finish.
- Move the finish cup 4 inches to the left without moving the starting point.
- Create a silent run by reducing bumps and hard drops.
Teamwork rules for siblings or classrooms
For two players, assign one child as the builder and one as the tester, then switch roles every five minutes. For larger groups, use three roles: designer, builder, and observer. The observer's job is to say exactly where the marble stopped or fell, not to blame the builder.
A useful rule is one voice during testing. Only the observer speaks while the marble is moving. After it stops, the team gets 60 seconds to agree on one change. This keeps the activity calm and helps children practice evidence-based problem solving.
Troubleshooting: Why the Marble Gets Stuck or Falls Off
Most problems have simple causes. Encourage children to describe what happened before fixing it. Did the marble stop, bounce, jump, wobble, or miss the next ramp? The description points to the solution.
- The marble stops on a ramp: increase the slope slightly, smooth down tape edges, or replace a bent ramp.
- The marble flies off the end: lower the angle, add a longer landing ramp, or create a curved paper guide at the drop.
- The marble falls off the side: raise the side rails or tilt the ramp so the outer edge is slightly higher.
- The marble gets stuck in a tube: shorten the tube, open it into a half-pipe, or check for tape blocking the inside.
- The track collapses: use a stiffer base, add tape at both ends of each ramp, or support the back of the board with books.
- The marble misses the finish cup: widen the finish area first, then make it smaller as a harder challenge.
Safer and Easier Alternatives for Younger Children
If marbles are not appropriate, the game still works with larger or softer objects. A pom-pom moves slowly and is quiet, but it may need steeper ramps. A crumpled paper ball is easy to replace and can be made larger than a marble. A ping-pong ball works best on wider ramps and bigger tubes.
For preschool-style play, build the track on the floor using cardboard ramps propped on books instead of a vertical board. Keep the path short: one ramp, one tunnel, and one basket. The goal can be simple, such as roll the ball into the box, rather than timing or scoring.
Clean-Up, Storage, and Reuse Ideas
A cardboard marble run can be saved if you have space. Remove the catch cup, lay the board flat, and store it behind a door or under a bed. If the board is too large, take a photo of the design, peel off the best ramps, and reuse them next time.
For a classroom or playroom, keep a small marble run bin with pre-cut strips, tubes, tape, and challenge cards. Avoid storing loose marbles in the same bin if young children have access to the room. Use a labeled container with a lid and return it to adult storage after play.
Common Mistakes to Avoid
The most common mistake is making the first design too complicated. Start with a track that can succeed, then add obstacles. Children usually learn more from improving a working design than from staring at an impossible one.
Another mistake is using too much permanent tape too early. Masking tape is better during the testing stage because pieces need to move. Save strong packing tape for the final version.
Finally, avoid turning every failed run into an adult fix. Ask a guiding question instead: Where did it stop? What changed right before it fell? Which piece could move one inch? These questions help children think like designers.
FAQ
What is the best cardboard for a marble run?
Corrugated shipping-box cardboard is best for the base because it is stiff. Thin cereal-box cardboard is useful for flexible ramps, funnels, and curved guides.
Can I make a cardboard marble run without hot glue?
Yes. Masking tape, painter's tape, or packing tape is enough for most indoor builds. Tape is also easier to adjust when children are testing and improving the track.
How do I make the marble run slower?
Lower the angle of the base, add a flatter ramp, include a gentle curve, or add a short open tube. Avoid blocking the path completely; the goal is controlled speed, not stopping.
What can I use instead of marbles?
Use pom-poms, crumpled paper balls, ping-pong balls, or other larger rolling objects. Choose an object that is too large to be a choking risk for the children in the room.
How many children can play at once?
Two to three children per marble run works well. For bigger groups, create teams and give each child a role, such as designer, builder, tester, or observer.
Is this a STEM activity?
Yes. Children experiment with slope, gravity, friction, speed, cause and effect, and iteration. It becomes more STEM-focused when they predict, test, observe, and change one variable at a time.
Conclusion
A DIY cardboard marble run indoor game is simple to start and easy to make more challenging. Build a sturdy base, add ramps one at a time, test after every change, and use side rails to keep the marble on track. Once the run works, turn it into a timed challenge, a scoring game, or a teamwork activity with clear roles.
The best part is that mistakes are useful. A stuck marble, missed ramp, or too-fast drop gives children a real design problem to solve with materials they already have at home.